Bloomin' Bookmarks
>> Friday, January 30, 2009
Not as tasty as their onion-y relatives, but considerably more appropriate to give as favors at my best friend's bridal shower!
The wedding will be in March, and she is using lots of blues, dark browns, and branches. She had wanted plantable paper favors for the wedding at one point, before going with something else, so I thought I would bring that element into the shower. I looked at the ones already for sale and none of them completely floated my boat, so I decided to make my own. Most of the available favors are pretty much useless after you remove the seeded paper, and I thought it would be nice if guests could plant some flowers and still have a usable/memorable item. Plus, my girl loves to read, so a bookmark seemed perfect. I ordered the plantable paper from Of the Earth because they seemed to have the best color selection and could deliver the quickest. I got the Lotka paper in Sequoia (brown) and Spruce (blue). It came in large sheets - 20" x 30" - and I didn't even use an entire sheet of each color for 50 favors.
Due to an unfortunate kidney stone after Christmas, and then an equally unfortunate stomach virus shortly thereafter, these got put off until the last minute. If I had been able to take more time, I could have made them a little neater, but I am still pretty happy with how they turned out!
Here's how I made them:
First, I cut some A7 cards (my choice: Luxe white from Paper Source) in half. The A7 size is 5" x 7", so once cut, you have two, 2.5" x 7" bookmarks, which I think is a perfect size. I also used a corner-rounding punch to make the 'marks look more polished. (sorry, I didn't start documenting until later!)
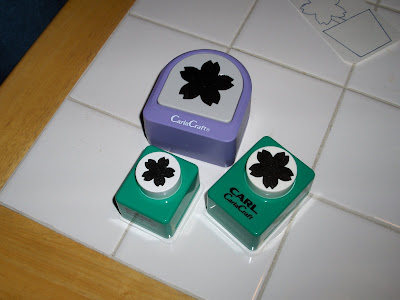
Next, I use some cherry blossom punches (from here) to get three different sized flowers in scrap paper. Here are the punches:
I also guesstimated what I wanted the flower pot to look like, and cut it out as well. Then I played with all the elements until I got a layout I was happy with and stuck them down. I traced around the flowers and pot, and filled in a branch and buds.


I tried scanning the pencil-drawn design, but had trouble working with it on the computer, so instead I traced it in ink and tried again.

I used VectorMagic to convert the scan into a smoother image and cleaned it up in Photoshop (I don't have Illustrator, or I am sure that would have been much easier). I filled in some colors to see what the final design would look like, even though it wasn't necessary for the Gocco. And I added some shower-appropriate text. Here is the whole design and the different colors:

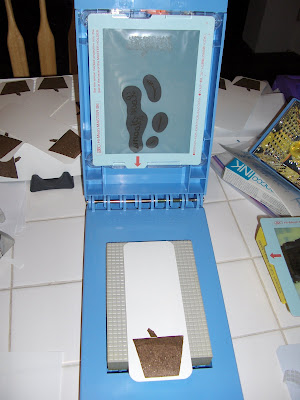
Now, I was so concerned about trying to do my first multi-color Gocco print, that I neglected to think about my unit's size limitations! I ended up having to print the brown elements in different parts. So first, the flower pot:

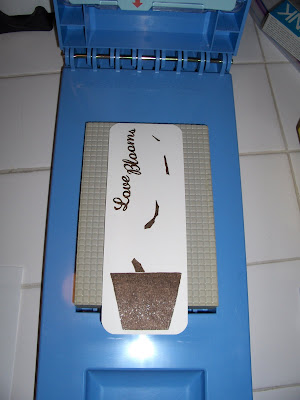
Then the branches and text:
I did the blue flowers next. I forgot to take pictures, but it is probably for the best. When I was doing the two separate brown printings, I sort of forgot that if they weren't lined up perfectly, then the flowers were going to be wonky. C'est la vie. I was far too lazy (and rushed) to do any fancy registration crap. I also didn't take any process pictures of printing the planting instructions on the back, but hey, I was in a time crunch!
While the prints were drying I (well, Michael, really) punched the flower appliques out of the blue plantable paper. I made the flower pots by cutting the brown plantable paper into strips and used a template to trace the sides before cutting. That meant that the pieces shared a side and it eliminated a lot of waste. (Sorry, no pictures of that either!). Once everything was ready, I laid it all out on the table and prepared to assemble.

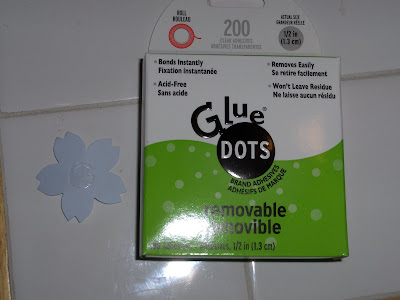
Enter Glue Dots! I bought the removable ones so that people would be able to take the plantable paper off without damaging the bookmark underneath. Below you can see what the dots look like on the back of that paper flower:


The wedding will be in March, and she is using lots of blues, dark browns, and branches. She had wanted plantable paper favors for the wedding at one point, before going with something else, so I thought I would bring that element into the shower. I looked at the ones already for sale and none of them completely floated my boat, so I decided to make my own. Most of the available favors are pretty much useless after you remove the seeded paper, and I thought it would be nice if guests could plant some flowers and still have a usable/memorable item. Plus, my girl loves to read, so a bookmark seemed perfect. I ordered the plantable paper from Of the Earth because they seemed to have the best color selection and could deliver the quickest. I got the Lotka paper in Sequoia (brown) and Spruce (blue). It came in large sheets - 20" x 30" - and I didn't even use an entire sheet of each color for 50 favors.
Due to an unfortunate kidney stone after Christmas, and then an equally unfortunate stomach virus shortly thereafter, these got put off until the last minute. If I had been able to take more time, I could have made them a little neater, but I am still pretty happy with how they turned out!
Here's how I made them:
First, I cut some A7 cards (my choice: Luxe white from Paper Source) in half. The A7 size is 5" x 7", so once cut, you have two, 2.5" x 7" bookmarks, which I think is a perfect size. I also used a corner-rounding punch to make the 'marks look more polished. (sorry, I didn't start documenting until later!)
Next, I use some cherry blossom punches (from here) to get three different sized flowers in scrap paper. Here are the punches:
I also guesstimated what I wanted the flower pot to look like, and cut it out as well. Then I played with all the elements until I got a layout I was happy with and stuck them down. I traced around the flowers and pot, and filled in a branch and buds.
I tried scanning the pencil-drawn design, but had trouble working with it on the computer, so instead I traced it in ink and tried again.
I used VectorMagic to convert the scan into a smoother image and cleaned it up in Photoshop (I don't have Illustrator, or I am sure that would have been much easier). I filled in some colors to see what the final design would look like, even though it wasn't necessary for the Gocco. And I added some shower-appropriate text. Here is the whole design and the different colors:
Now, I was so concerned about trying to do my first multi-color Gocco print, that I neglected to think about my unit's size limitations! I ended up having to print the brown elements in different parts. So first, the flower pot:
Then the branches and text:
I did the blue flowers next. I forgot to take pictures, but it is probably for the best. When I was doing the two separate brown printings, I sort of forgot that if they weren't lined up perfectly, then the flowers were going to be wonky. C'est la vie. I was far too lazy (and rushed) to do any fancy registration crap. I also didn't take any process pictures of printing the planting instructions on the back, but hey, I was in a time crunch!
While the prints were drying I (well, Michael, really) punched the flower appliques out of the blue plantable paper. I made the flower pots by cutting the brown plantable paper into strips and used a template to trace the sides before cutting. That meant that the pieces shared a side and it eliminated a lot of waste. (Sorry, no pictures of that either!). Once everything was ready, I laid it all out on the table and prepared to assemble.
Enter Glue Dots! I bought the removable ones so that people would be able to take the plantable paper off without damaging the bookmark underneath. Below you can see what the dots look like on the back of that paper flower:
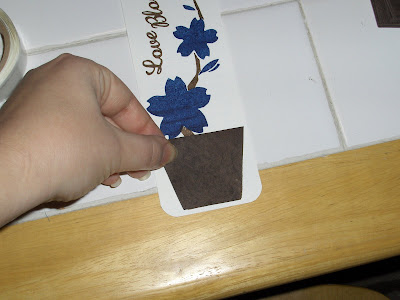
For assembly, I attached the pots first:
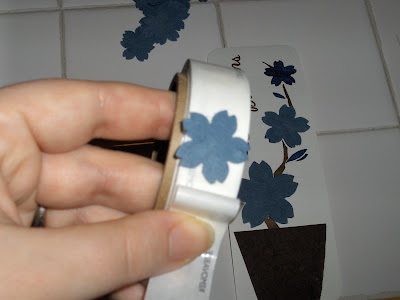
Then I attached the flowers:
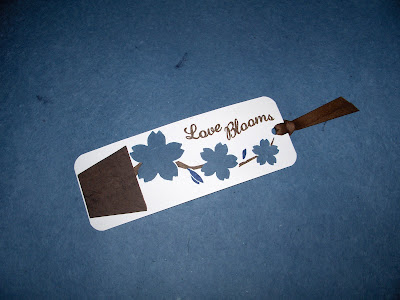
Finally, I punched a hole in the top of each and added a ribbon. On a side note, I completely adore this ribbon. I pretty much hate all things plastic, polyester, and nylon, so this cotton curling ribbon is right up my alley. I haven't even tried curling it yet, but I plan to buy more to use for gifts and such. Here's the back:
Here are the final products laid out around the cake (BTW, how awesome is that cake?) at the shower. They would have looked better fanned out in little groups, but one of the other girls volunteered to put them out, and I didn't want to change them after she had done it. Oh, well.
So, all said and done, I am really happy with them, but I don't know if I will ever make them again, as they were pretty labor-intensive. Even if I do, I think I will print the bookmarks in one color. It will save Gocco supplies and make printing easier. Aside from all the screens and bulbs, though, these were actually pretty cheap to make.
Let me know if you have any questions about the products or the process, and I will try to help you out!
0 comments:
Post a Comment